.
tags: corset, bra, bias tape, measuring, stride length, leotard pattern, keyhole back, back dart, collar, cap sleeve, skirt fabrics, non-stretch underskirt, velvet, velvet pressing board, needle board, overdress, 3-D jewels, simple skirt patterns
TOPICS DISCUSSED
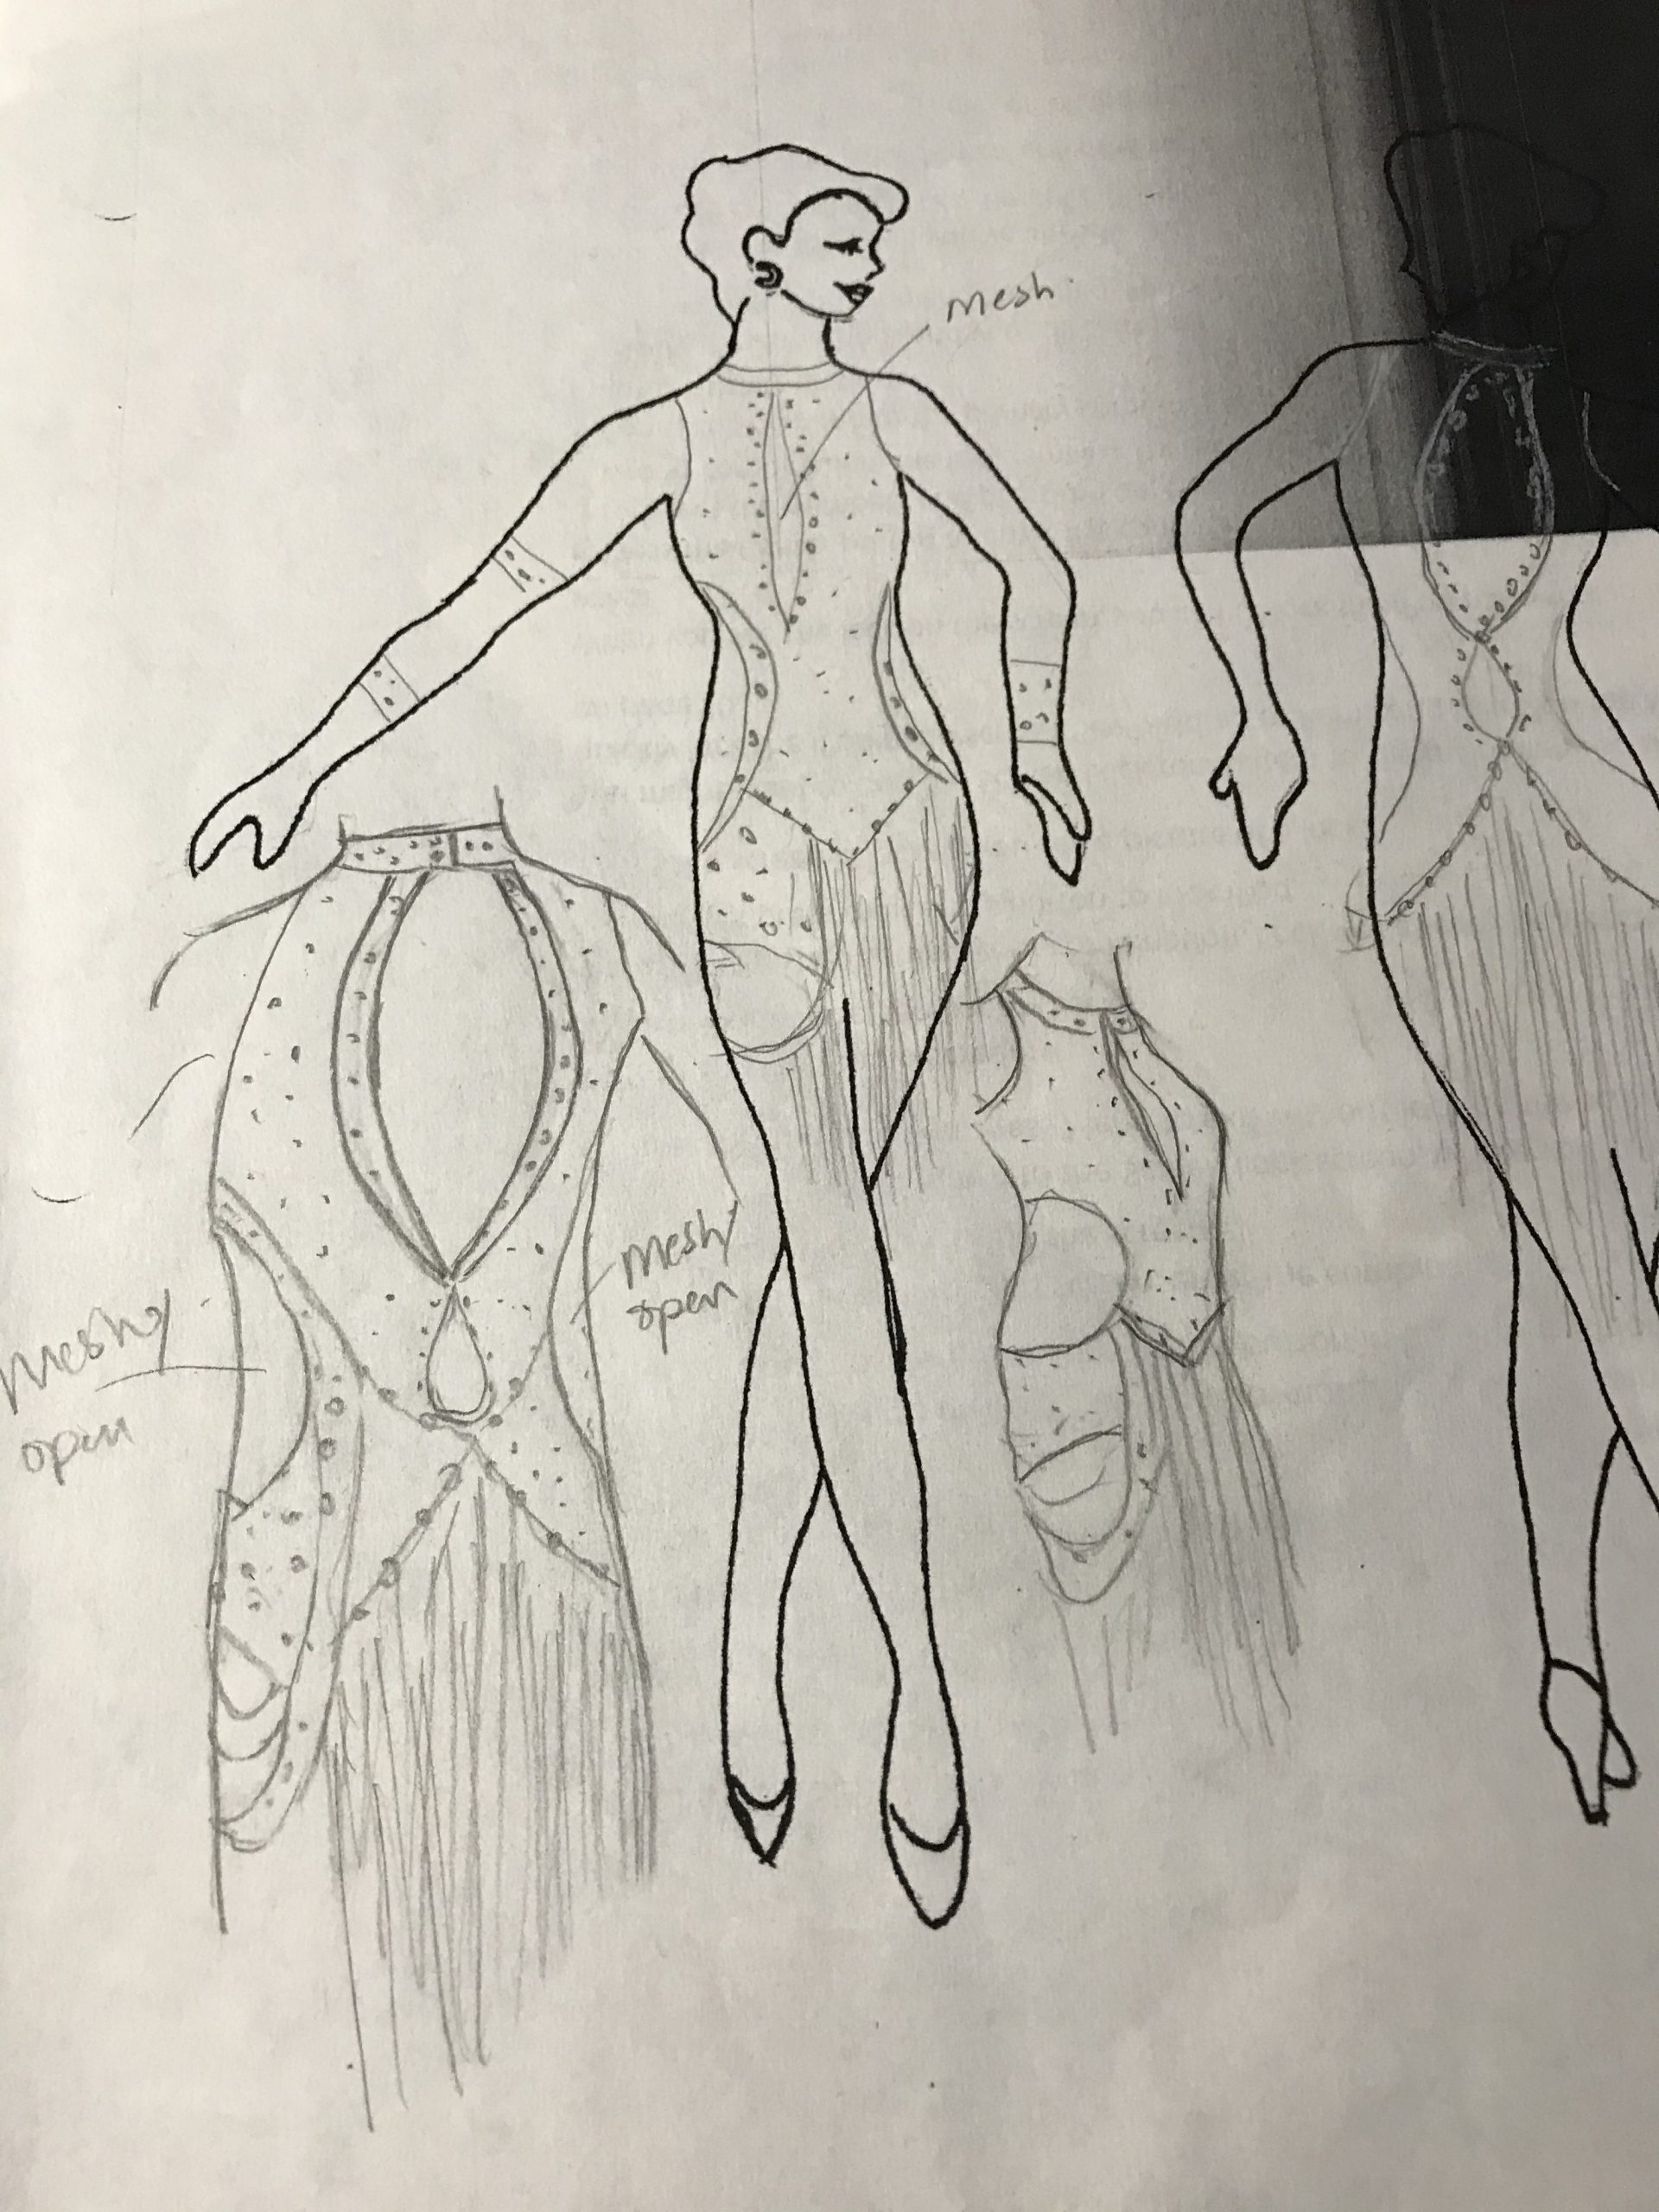
Stephanie’s Q: I had an idea to make a bodice of a dress that looks similar to a corset/bustier style.
Do you think this would be possible to make using all stretch fabrics? (4:00-12:20)
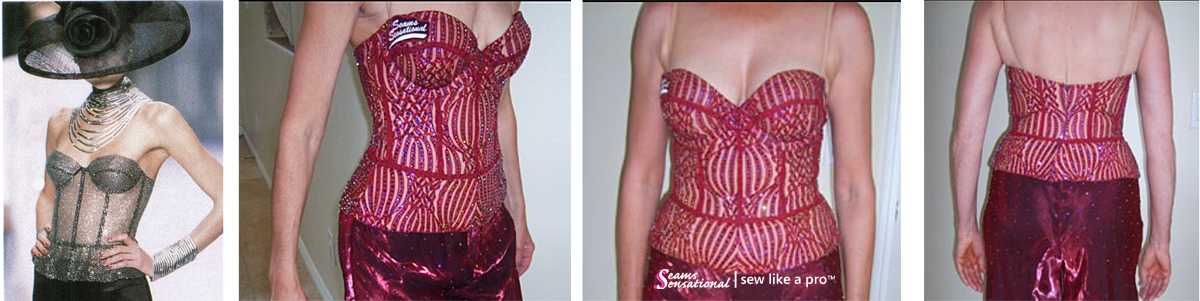
T’s answer: So far this looks great!
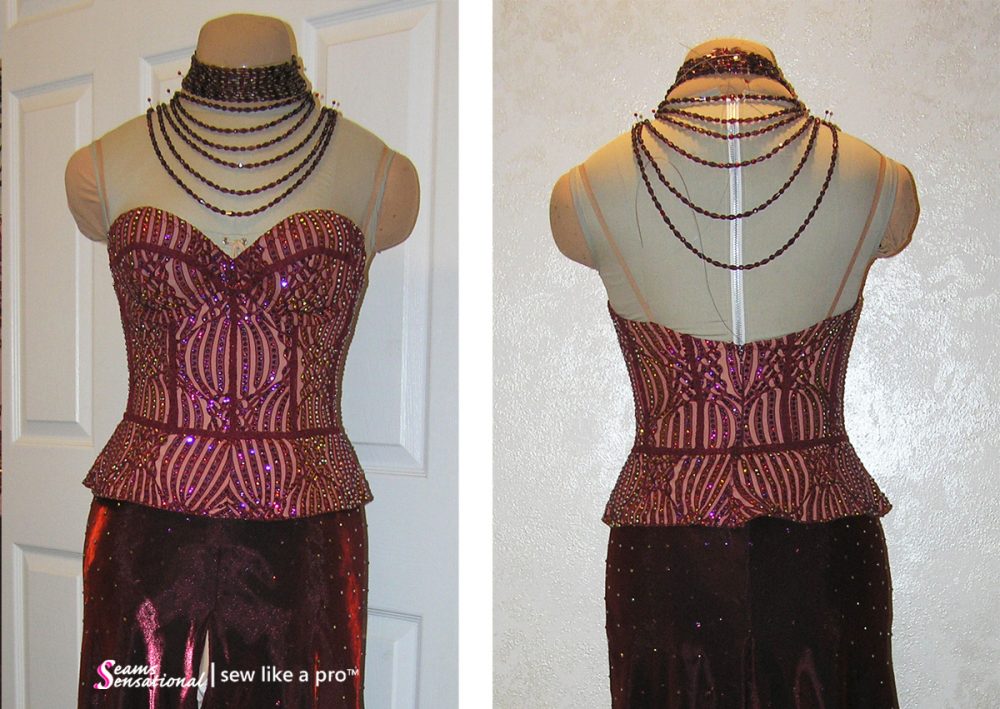
Here are images of a dress I made based on a fashion runway bustier.
All you have to do is buy a bra and cover it with your fabric and bias tape. Then you have built-in bust support and a true bustier shape.
- On the dressform (or on yourself), put the bra over the leotard.
- Pin the bra to the leotard along the underwire or the bottom of the wireless bra. ,
- Securely hand stitch the bra to the leotard along the bottom of the bra.
- Cut away most of the excess leotard that is inside the bra, leaving about 1.5″ or 6cm until you try it on again and make sure the fit is good. After a fitting, you can cut away all the leotard excess.
Be aware though that you should choose a bra that offers the amount of coverage you feel comfortable showing. Also, many strapless bras are loose fitting in the actual bra cup. If this is not something you want, then you’re better off not using a bra and making the bustier built upon padded bra cups that are the shape and size you want. Braza Bra offers a variety of natural shape bust support.
Stephanie’s Q #2: How do you sew the lines on?
T’s answer: Since you hand sew beautifully, it would probably be best to hand sew them on.
Definitely pin the accent lines on the dress while it is on the dressform before sewing. Feel free to do a fitting before hand sewing to make sure the lines are in the best place for your body shape.
Also, I suggest making the accent lines out of a stretch fabric so it moves with the leotard instead of fighting against it.
Julie’s Q: As a new member I’m only at the stage of drafting a leotard, but have already hit a bump!
I am trying to draft the front of the leotard pattern, but when I tried to draw in the crotch section I found it sat too high (it crosses over my hipline). I am trying to create a crotch including snaps, so deducted 10cm (4”) from half my stride measurement. My stride is 66cm (26”), so I measured the base of the front crotch to be at 66/2=33 -10 = 23cm (9”), or 26” ÷ 2 = 13” On the blueprint it also says to deduct 4cm to create the front stride, which would be 66/2= 33-4= 29cm. I tried this as an alternative and it looks better, but then the total of front and back stride does not equate to 66cm.
I am wondering whether I should have put the hipline higher (eg measured 18 cm from waistline rather than the 19 I used). However, even if I did that it would still look wrong if I deduct 10cm. Clearly I’m going wrong somewhere, but I’m not sure where. (12:45-27:45)
T’s answer: I need to see photos, please, and I need more time to process the conversion from metric to standard. Will you please email me the following photos:
1) measurement card
2) completed “fill-in-the-blank” blueprint sheet
3) back pattern piece (with the grid showing through the paper like the front piece that you posted
on our Facebook group.)
Liddy's Q: To help prevent the keyhole opening from gaping, should I fold the diagonal back dart in my leotard pattern that you recommend doing for low cut backs? The opening goes as low as the waist. (27:45-35:15)
T's answer: Yes. The keyhole is low enough that you will need a back dart.
If the keyhole was to the bra line or higher, you would not need to fold the diagonal dart into the back paper pattern before cutting.
Liddy's Q #2: I want to make a cap sleeve. Do I use a normal sleeve pattern or not?
T's answer: Yes, use the SLP™ pattern just as it is.
- Finish off the keyhole first.
- Next fit and attach the collar leaving as wide of an opening on the collar as you like.
- Meaning, on your sketch, it looks like the keyhole does not meet at the very center of the collar. It looks like the collar will have several inches or centimeters that is collar-only, no leotard.
- Overlock the collar to the leotard.
- On the edges of the collar that are freestanding or stand-alone (that do not have the leotard sewn to it), I would fold the loose, overlocked edge of the collar up like a narrow hem and whipstitch it to make it tidy. If the keyhole opening was wider at the top and the stand-alone part of the collar was very wide, I would suggest you finish off the stand-alone parts of the collar first, then set it in. However, since your stand-alone opening is not very wide, you can get away with doing the fast whipstitch.
Liddy's Q #3: Do you put elastic in the collar?
T's answer: No, you don't need elastic as long as you follow the pattern in the member site. Just follow the instructions in the links above.
Sharon's Q: Are Smooth skirts normally stretch fabrics? Or is there no normal? Does any fabric work for a skirt? (35:15-41:00)
T's answer: There is no normal for Smooth skirts. Either stretch or non-stretch is fine. If you use a stretch fabric, line the skirt with a non-stretch fabric and let it hang a little longer than the stretch fabric, because it will help keep you from catching your heel in the stretch fabric. That's the only problem with using a stretch fabric for Smooth/Standard skirts. Watch the video in module 8 in the CBG site on using a non-stretch under layer. You construct the under layer just as you would construct the stretch layer. Also download the Basic Ballgown Skirt Guide in Module 1, which talks about which fabrics to use for different skirts.
Latin skirts typically do not have a non-stretch underskirt for the intended purpose of preventing the shoe heel from getting caught in the fabric. However, if short skirt wearers want a two layer skirt, it would certainly be okay to use either a non-stretch or a stretch fabric as the underskirt layer.
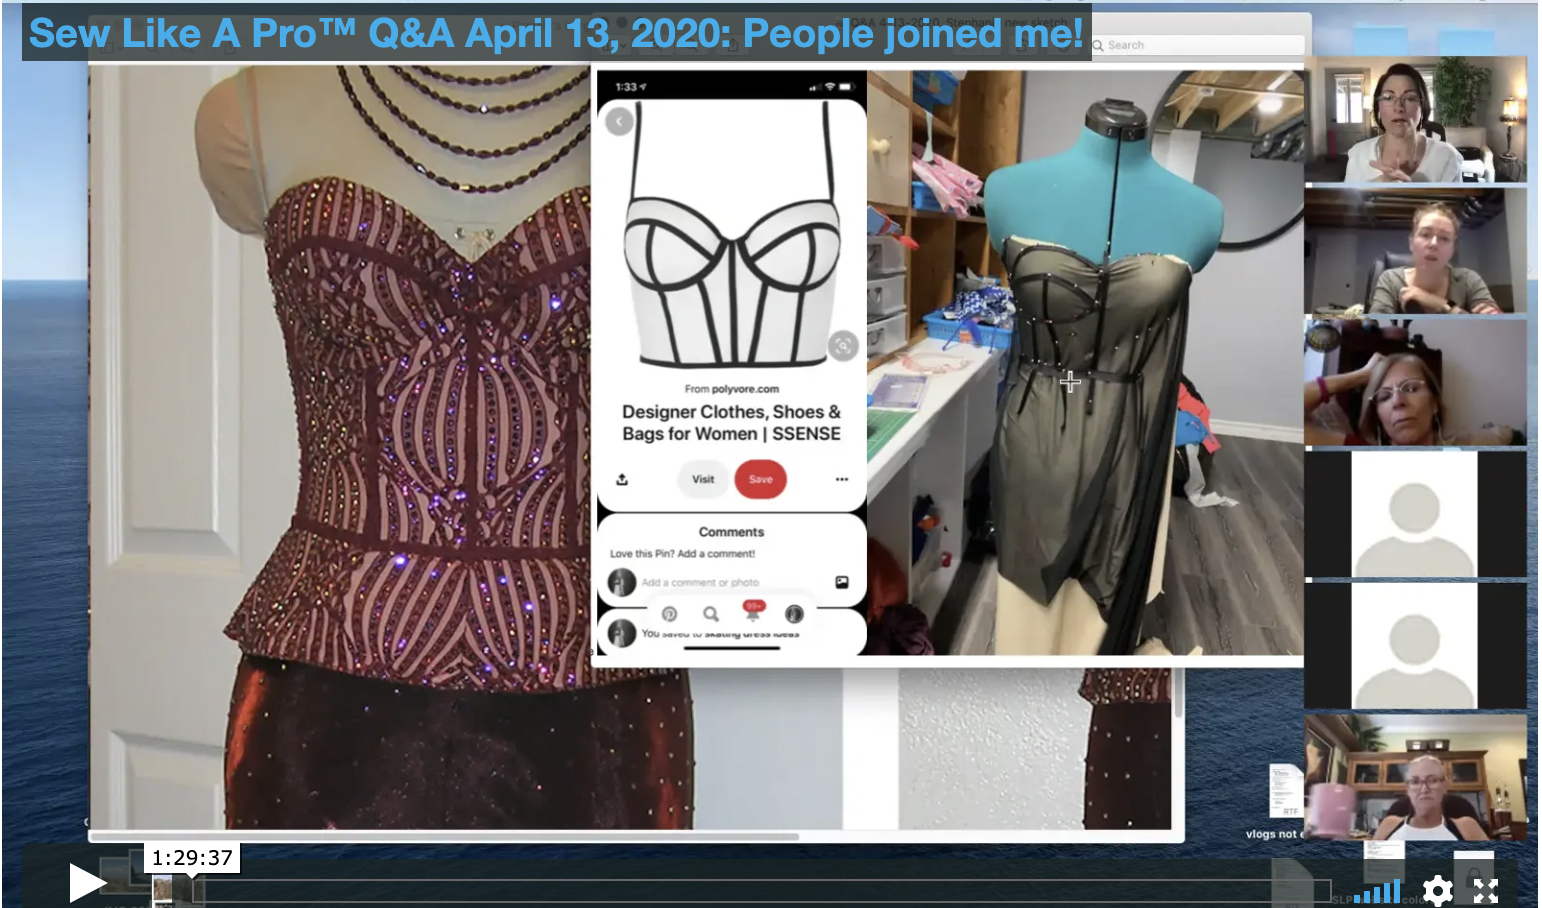
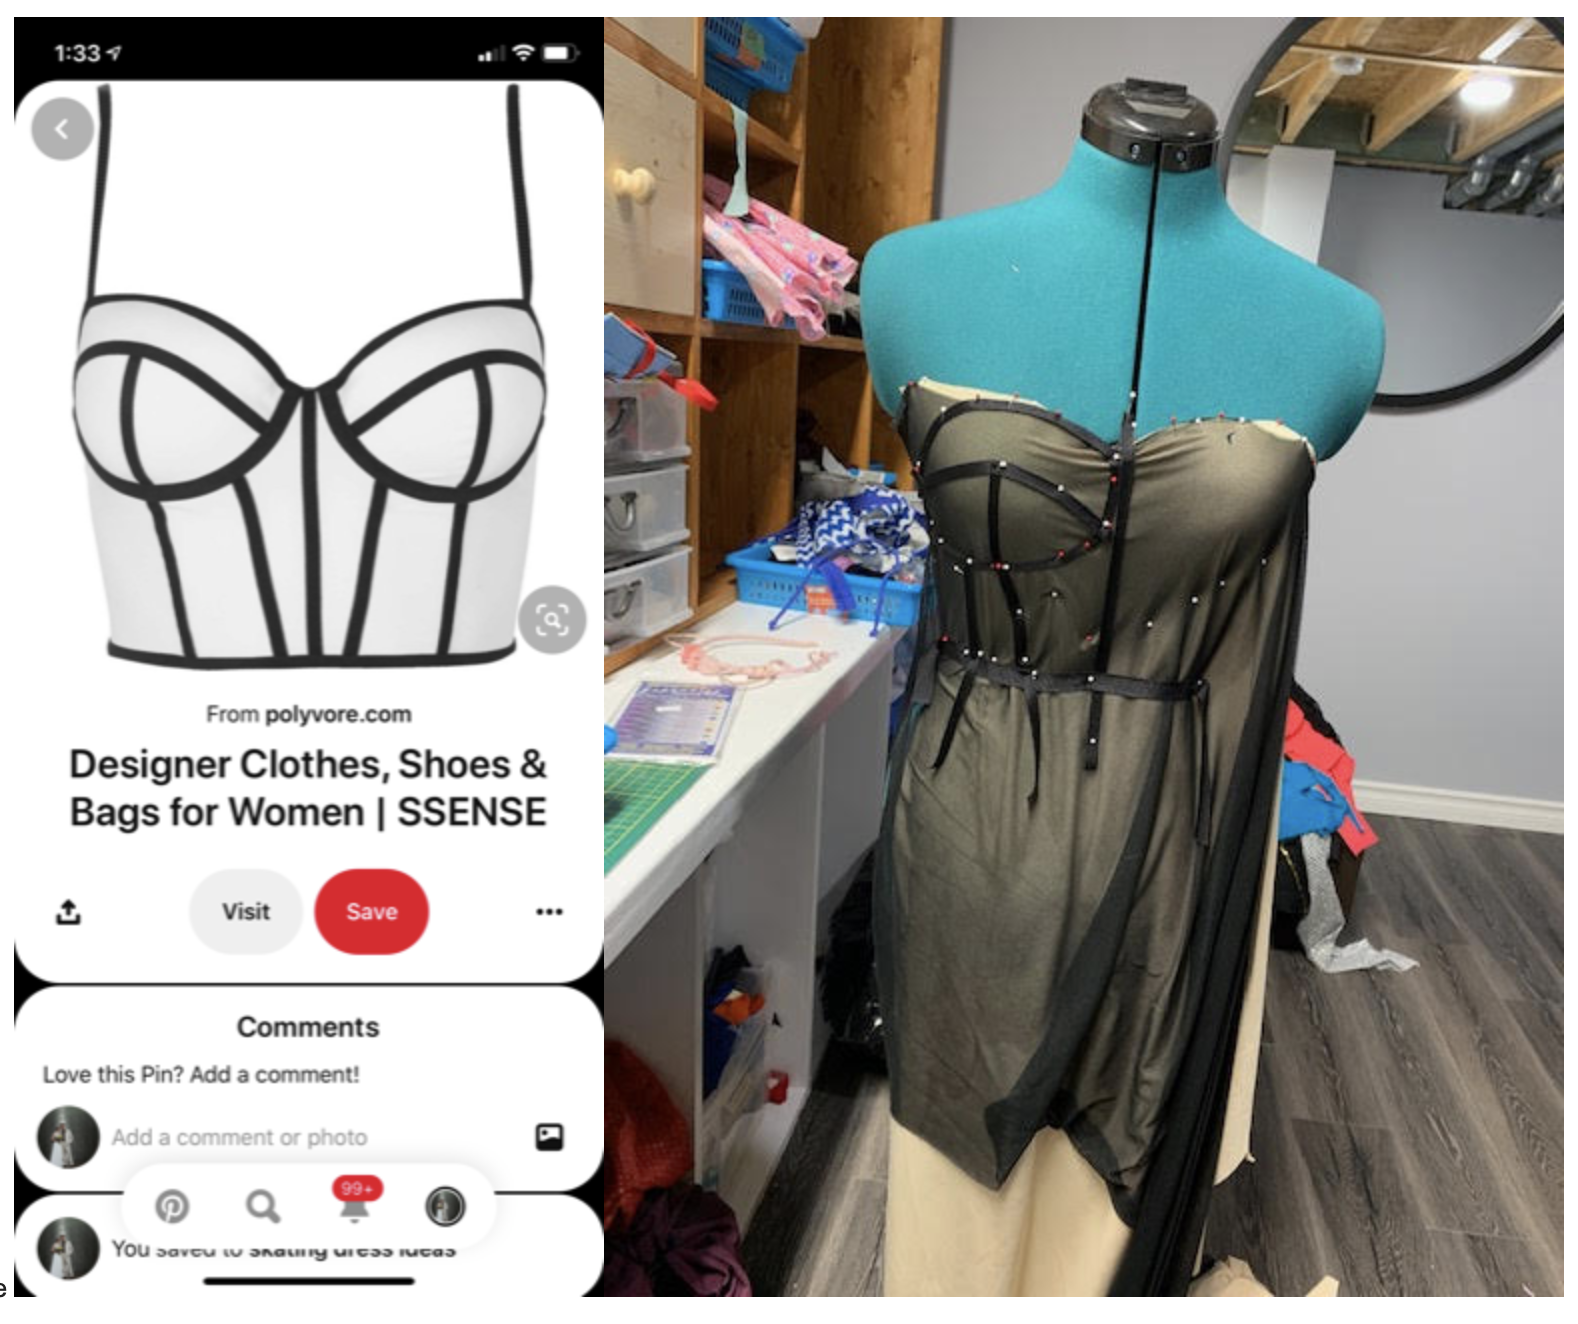
Candice's Q #1: What's the best way to make the Latin dress below with smooth velvet? (41:00-1:02:35)
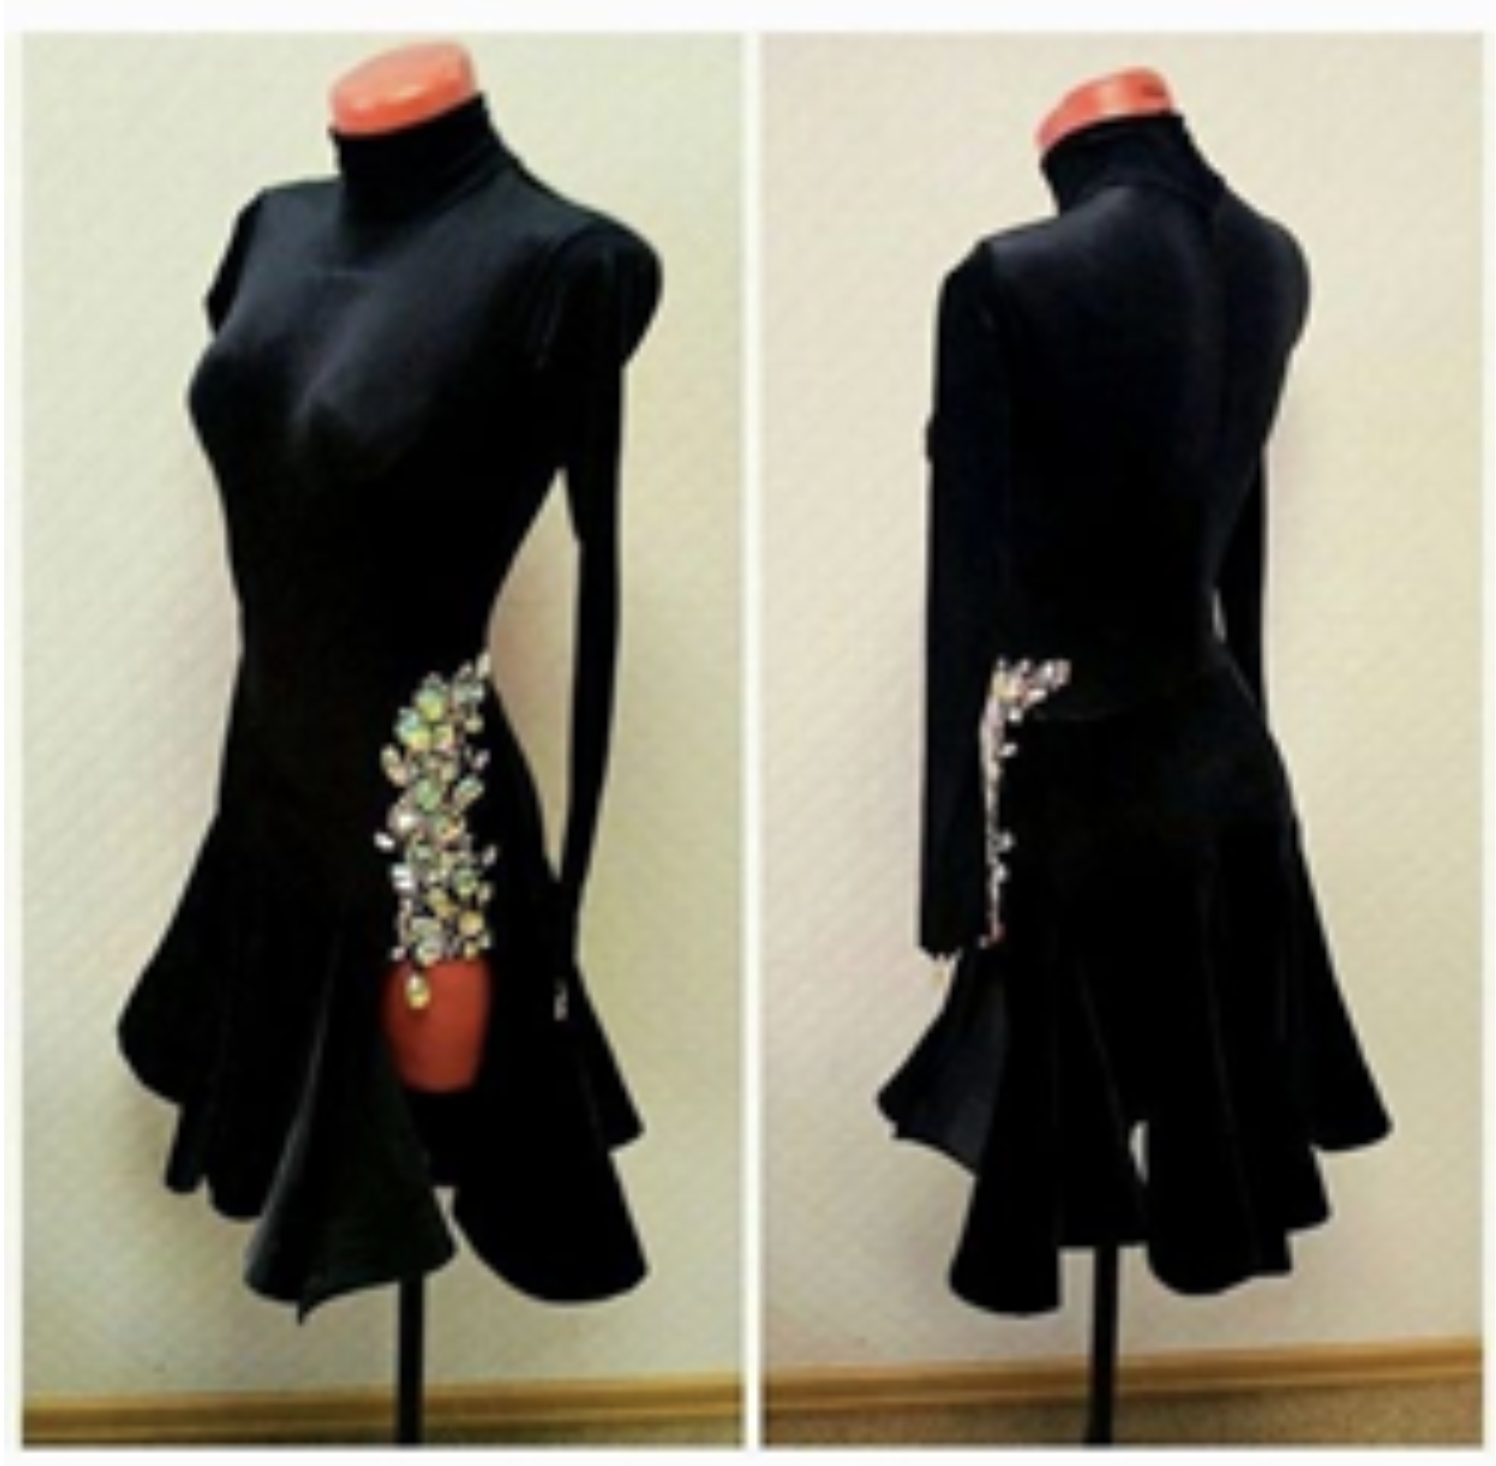
T's answer: First, please do not duplicate this dress exactly. Making the same dress in a different color is still copying it.
Copy is not cool for several reasons:
- It's not fair to the designer/dressmaker
- It's not fair to the woman who buys your inspiration dress.
- It would be really terrible if you and the woman who bought this dress were at the same competition!
Candice, this has the potential to be another complicated dress. You have a lot of details to pay attention to.
Please watch my blog featuring a velvet dress made by another SLP™ member. In this blog, I talk about which direction to sew the 'nap.' All the velvet pieces must be cut going the same direction - meaning the top has to be the top on every single piece. Due to the nap of the velvet, you cannot rotate the pattern pieces so the hem is at the "top" of the fabric.
You will also need a velvet pressing board, which we talked about in the November 3, 2018 Q&A. If you use a regular iron, it will crush the velvet. You definitely need to invest in a velvet pressing board, also called a "needle board".
There are two ways you can construct this dress. First, you could cut the skirt out and attach it to the leotard like a "basic" design. Or, you can make this as an overdress.
Doing a "basic" construction option means you will see a seam where the skirt attaches to the leotard because velvet is too textured to sew on nice and flat.
For a "basic" design in which the skirt attaches directly to the leotard, you will make a single layer velvet leotard (unless the velvet is super lightweight, you probably do not need to line it with lycra since you are very lean. However, you can line the velvet leotard if you wish.) Do not line the sleeves; you will be too hot. NOTE: Skaters may want to line both the leo and sleeves if you wish to stay warm when not performing.
Or, for the overdress option, you will need a single layer lycra leotard and a single layer velvet dress that goes over the leotard. the sleeves are still single layer as mentioned for the basic construction. Doing this option prevents seeing the skirt attachment line because there is not one. However, since this is only the second dress you have ever made, I recommend you do the basic construction instead of the overdress. The overdress is a lot more planning, sewing work and requires more fabric. Watch the overdress breakdown in module 1 and the overdress training in module 5.
I think it would look beautiful if you added an open back to your dress. The cluster of jewels is also gorgeous. It looks like the jewels are different heights, which creates a very 3-D look. It would be really cool if you retained this 3-D look by making little 'platforms' for the jewels. So, sew some of the jewels directly to the dress. Then glue some of the jewels to little 'platforms' made of several layers of lycra or velvet, which you can cut to the shape of the jewel. Then you can attach the raised jewels to the dress. The flatter and raised jewels intermixed will create a neat 3-D effect. You can even use three different heights.
I recommend making bracelets about 2-3 in/5-7 cm wide to go with the dress.
I love the asymmetrical skirt attachment line on this dress. For this amount of skirt volume, I would probably do a five panel fluted skirt, with a 40mm or 75mm crinoline in the hem.
Candice's Q #2: Do you think the skirt goes to just above the knee?
T's answer: I would make the skirt whatever length looks good on your body. So, you might make the shortest part about mid-thigh, then make the longest point just above or at the mid-knee.
Before you make your dress, make sure you are not copying this design exactly.
Watch this video in case you want to have a laugh when I realize I've been talking to myself because I was online an hour early.... Plus, I really did answer Candice's and Liddy's Qs. What I said here may differ from what I said on the call with living, breathing people.
.
Do you want to be listed on the SLP™ Professional Dressmakers Available page? This is free advertising for those who wish to make dresses, practice wear and alterations for paying clients.
Also, you can list dresses you made for yourself and wish to sell.
.
Search here to find information throughout the entire member site as well as public blogs.